It is often necessary to transfer data from existing Excel tables, Google Sheets, etc.for Leads, Deals, Contacts, and Companies, regular import is provided. in the box version of Bitrix24, this can be done using internal tools via the control panel, but in the cloud version there are no such tools. And what if the table is completely individual, for example, the register of machinery and equipment?
First, let's look at how such tables are stored in Bitrix24. Universal lists stored in groups are used for this purpose. If you are not familiar with this bitrix24 tool, we recommend that you familiarize yourself with It https://helpdesk.bitrix24.ru/open/1428438/?sphrase_id=7138119 In a nutshell , in the universal list, you define the names and data type of fields (table columns) and then fill in and edit the table using the form or through the Business process (BP).
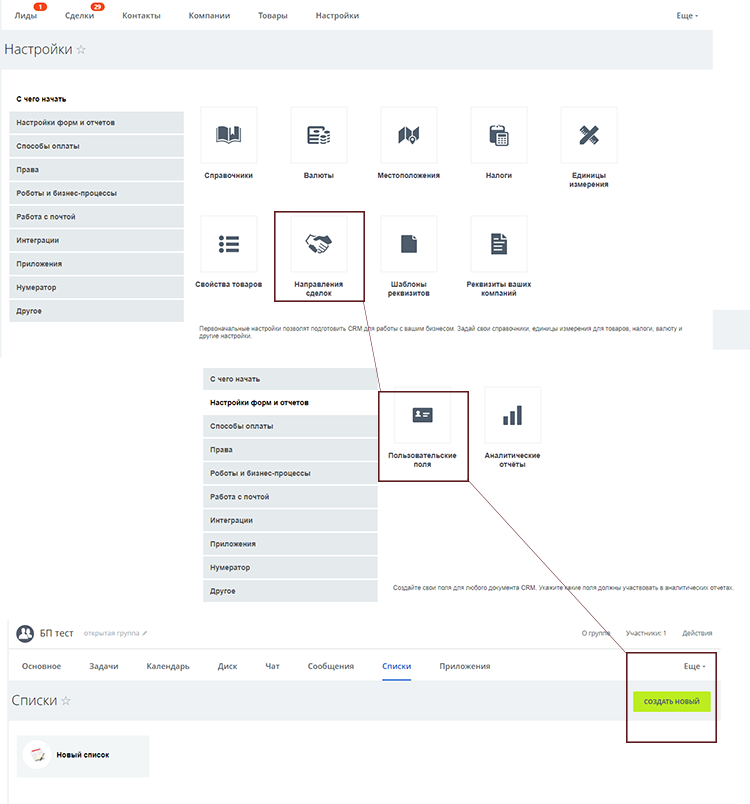
Thanks to the ability to generate rows of such a list through the business process, we will conduct our import. To do this, use the regular import of Transactions. For transactions, you can create custom fields that we can use when importing. We do not need the deals themselves, so in order not to interfere with the work of employees and not to spoil the statistics in the CRM for these tasks, we will create a separate transaction direction, limiting access to it.

Step 1. Preparing data for import
First, we need to determine the types of fields in the table we have. There aren't many of them:
- Line
- List
- Link
- Date-time
- Yes/No
- Number
- Linking to a user
- Linking to CRM elements
- Google map address
- Booking resources
- File
- Money
- Linking to CRM reference lists
- Linking to sections of INF blocks
- Binding to INF block elements
With this procedure, it is better to reduce all data to the first 8 types. Thus, we should have as many additional fields in the transaction card (if we do not use regular transaction fields) as there are columns in our table. You will get this table of necessary transformations:
| Source file | Transaction field | List field |
|---|---|---|
| String | String | String |
| Text | String | Detailed text |
| List | String | List |
| Link | String | String |
| Date | Date/Time | Date |
| Date/Time | Date/Time | Date/Time |
| Yes, no (+/-) | String | List |
| Number | Number | Number |
| Money | Number | Number |
| Company employee | Number | Binding to the user |
| Linking to CRM elements | Name/Name, phone number / E-mail | Linking to CRM elements |
When creating them, we will need to consider the following data type properties. Then we will talk about the data in the source document:
String, Text - traditional field is not limited to 256 characters, so it is possible to send a large text in the results list we keep in the type field “Detailed text”.
List - if you use a set of options for a field when working with a table, you must create a “String” to import the value of this field, because cloud Bitrix24 has a number of restrictions on working with lists, i.e. the string value cannot be “given” to a list field. The easiest way is to describe the conditions that assign corresponding values to fields in the business process responsible for importing.
Link-list does not support links, so you need to pass it as a normal string.
Date, date/time - it is important not to make a mistake with the format and include time accounting when creating a field in the transaction.
Yes/No, checkbox-there is no regular similar type of field in the list, so the most correct solution here is to create a "List" type element, the purpose of this item is described above. But it is important to keep in mind that now you will have 3 statuses (Yes, no, not selected), not 2 (Yes, no).
Number-a number is always a number, and in this case it will work with both integers and fractional numbers.
Employee - an Employee (if there is one in Bitrix24) can also be passed as a string (First and last Name), but then you will have to write a condition for each one in the DB to associate it with the employee. We suggest replacing the names of employees with their ID in the portal even in the original table. And assign the resulting number to the field.
Linking to CRM elements - for this purpose, we will need unique fields, so it is better to use the company name or contact name and their e-mail or phone number.
Let's now go through the rest of the steps that need to be done for this import.
Step 2. Preparing CRM for import
From the CRM side we need to perform 3 actions:

- Creating the direction for transactions that the import will pass through, so as not to spoil statistics and reports. You can find a detailed description here.
- Creating custom fields for deals in the CRM settings. You can find a detailed description here.
- Creating a list in the group where we will store the received data. You can find a detailed description here.
Step 3. Create a business process responsible for importing data

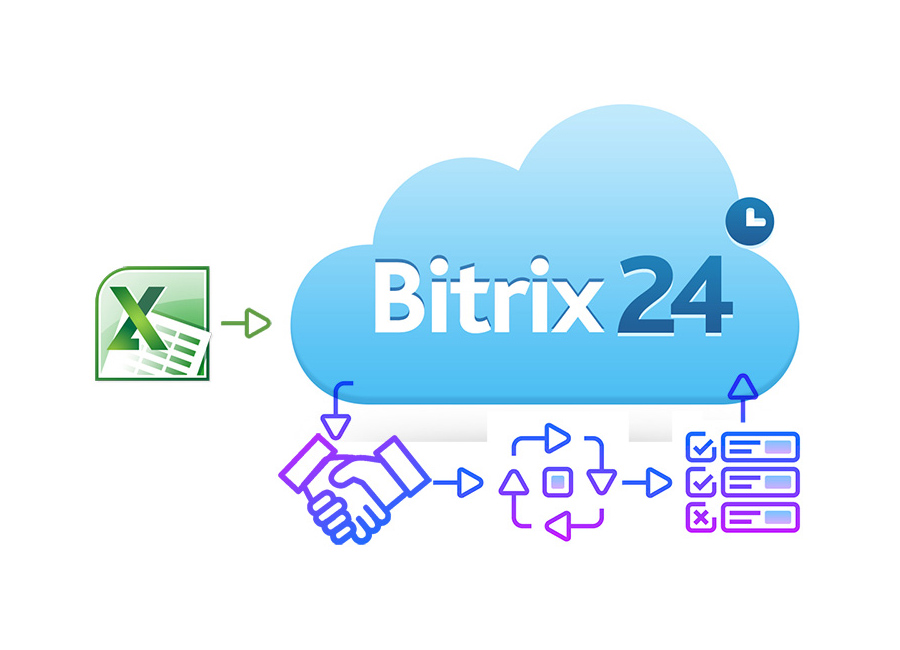
The image above shows a schematic diagram of the business process. The main steps are as follows:
- We are waiting for the transaction stage in the direction we created.
- Creating an entry in the list.
- Processing the transformations necessary to work with fields of the "List" type".
- Adding the necessary values to the list row.
- Completing the transaction.
Step 4. The import process
Download a CSV template for uploading deals. The import procedure is described in detail here. When working with it, do not use Microsoft Excel because it interprets this format quite frivolously. You may have difficulties opening it and importing it later. We recommend using the free Libre Office or another program.
Moving the data to the table - the fields we added appeared at the end of it. Do not forget to fill in the transaction direction and the responsible person.
Perform the import and go to the group with the list. In the future, the list can be updated by the business process or managed manually.


